One Click will do the trick
4.6 CUSTOMIZE PIPELINE DASHBOARD
iGlobe CRM gives you the ability to customize the Pipeline dashboard to fit your need. Please notice, the Pipeline dashboards will be the same for all users of iGlobe CRM.
Below are three examples of how you can design your pipeline Dashboard.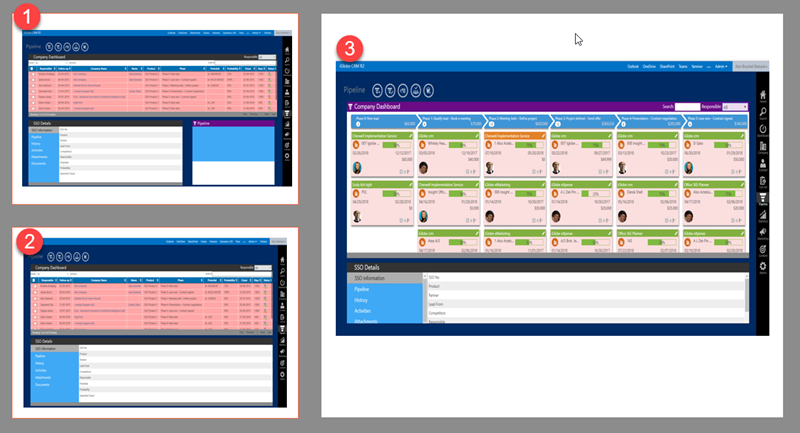
The dashboard is composed using web-parts. Notice! Should you choose the SSO Thump.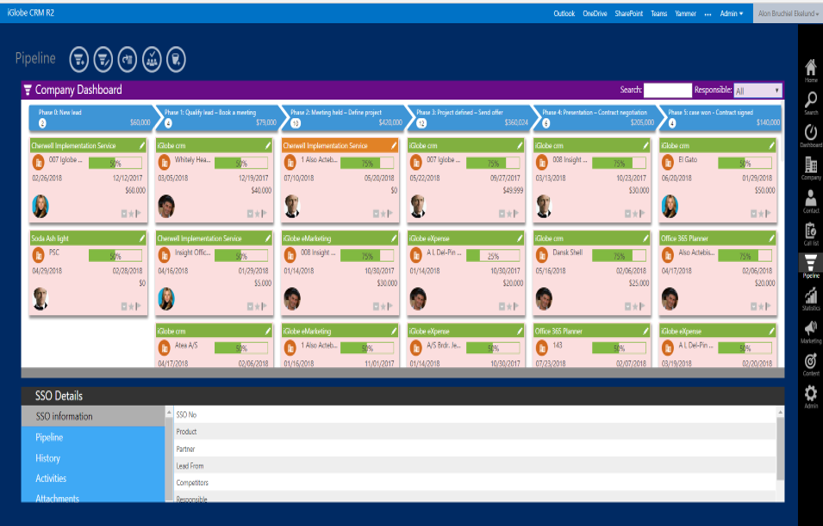
The SSO Thumb uses the number of phases you have in your pipeline. By default, iGlobe CRM is using 6 phases. That is the maximum number of phases recommended for using the SSO Thumb webpart. If you have more than 6 phases in your pipeline/sales-process we recommend using the Pipeline list.
CUSTOM FIELDS IN YOUR PIPELINE LIST
Should you want to show custom fields in your pipeline you will also have to select the Pipeline list view!
Customizing the Pipeline Dashboard
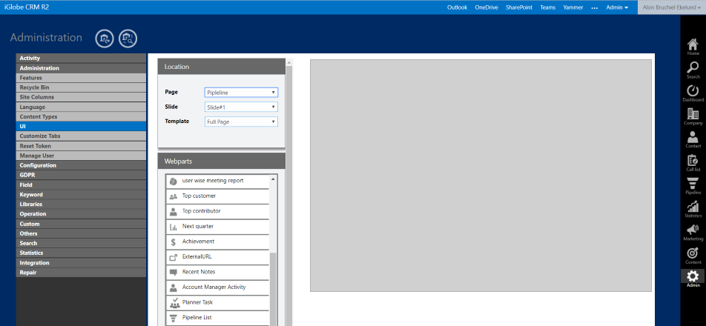
Dashboard customization is done in iGlobe Administration area. Access the administration, open the Administration menu and select “UI”.

The UI configuration are managed in three areas
- 1. Location
- 2. Web parts
- 3. Dashboard UI
From the location from the Page drop downlist – select Pipeline.

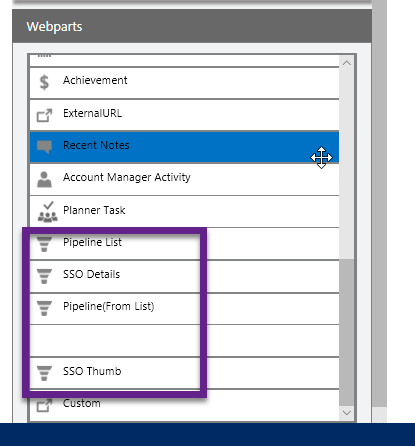
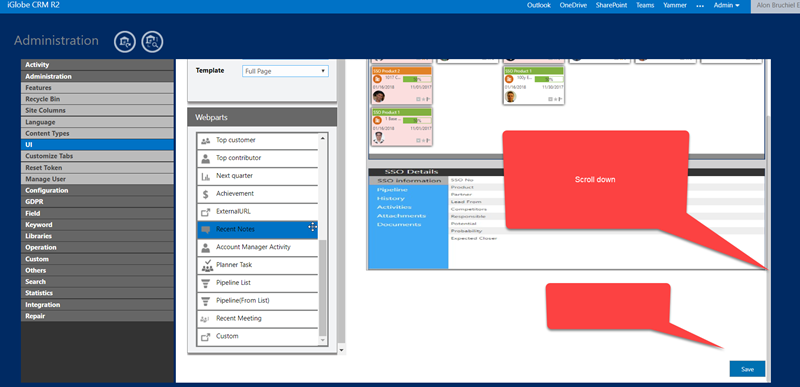
The dashboard is composed using web-parts. You have the following available for the Pipeline Dasboard
* Pipeline List
-
* SSO Details
-
* Pipeline (From List)
-
* SSO Thumb
Changing the dashboard UI
Select the template you want your Dashboard should look like. If you want to use a Dashboard with two web parts we recommend you using the Full-Page template.
Now, simply drag web-parts to fill out the dashboard. Following is an example This example will show how you can design a Dashboard using the Thumb Dashboard. This will also explain how you can change the settings of each web-part
- Select the web part SSO Thumb and drag it to the empty spot.
- Set the Hight to 60%
- Click on Apply

Now to Add the second web part SSO Details
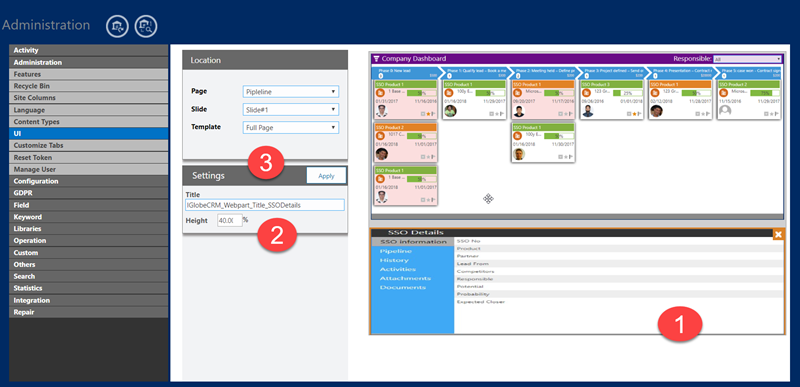
- Select the web part SSO Details and drag it to the empty spot.
- Set the Hight to 40%
- Click on Apply
Now lets save the new Dashboard
You have now composed a new Pipeline Dashboard.
IMPORTANT! Click Ctrl F5 to clear you browser cache. Now go to the Pipeline area and you will see your new Dashboard as illustrated by the below example. Notice the example already have opportunity in the list. Your list will probably be empty.